Hazardous materials (HAZMAT) play a vital role in various industries, but handling them safely is non-negotiable due to their risks. The Hazardous Materials Table (HMT) is a go-to resource for those dealing with or shipping these materials. Yet, its complexity can be overwhelming for newcomers.
This guide is here to help you navigate the HMT, making it accessible and understandable. We’ll break down its structure, offer practical tips for using it effectively, and even provide a hands-on scenario to test your skills.
What is the HAZMAT Table?
The HAZMAT Table is a vital component of the Hazardous Materials Regulations (HMR) issued by the Pipeline and Hazardous Materials Safety Administration (PHMSA) in the United States. It provides essential information for the safe transportation of hazardous materials by road, rail, air, and water. The table contains detailed data about various hazardous substances, including their proper shipping names, identification numbers, hazard classes, and packing groups.
The Components of HAZMAT Table
The HMT is a meticulously crafted table containing a wealth of information on various hazardous materials. It’s typically comprised of ten columns, each acting as a key to understanding the properties and regulations surrounding these materials:
Column 1 (Shipping Information): This column utilizes symbols to communicate special shipping requirements for specific modes of transport, such as air, water, or domestic travel. These symbols help ensure compliance with regulations and promote safe transportation. Here’s a breakdown of the most common symbols you might encounter:
- Plus Sign (+): This symbol locks in the classification of a hazardous material listed in Columns 2,3, and 5, regardless of whether it fully meets those criteria or not. It’s like a fixed label for that specific material.
- Letter “A”: If you see this, it means the regulations only apply if the material is being transported by aircraft. Otherwise, it might be okay for ground or water transport without extra rules. But, if it’s labeled as hazardous by the US DOT, then it’s regulated ono matter how it’s shipped, even with the “A” symbol.
- Letter “D”: This symbol indicates that the material’s shipping description is okay for domestic US transportation. However, it might not meet international shipping standards from organizations like IMO or ICAO. You might need to use a different name or follow extra steps for international shipping.
- Letter “G”: Less common, this symbol shows that the material is regulated under exemptions from some HMR parts. It’s still hazardous, so you have to follow specific packaging and shipping rules listed in the exemption.
- Letter “I”: If you spot this, it means the shipping description is mainly for international transportation. THere might be a different name for domestic US transport.
- Letter “W”: This symbol means the regulations only apply if the material is being shipped by vessel (like a ship). It might not need extra rules for ground or air transport. But again, if it’s labeled as hazardous, it’s regulated regardless of how it’s shipped.
Column 2 (Descriptions & Proper Shipping Names): This column serves as the directory for identifying materials. Here, you’ll find them listed alphabetically by their designated shipping name, which is crucial for accurate labeling on shipping documents.
Column 3 (Hazard Class/Division): This column plays a vital role in classifying the primary hazard a material poses. Common hazard classes include flammable liquids, explosives, and toxins.
Column 4 (Identification Numbers): Each material is assigned a unique identification number, often prefixed with “UN” for internationally recognized shipments.
Column 5 (Packing Group): This column signifies the level of danger a material presents. Packing Group I signifies high danger, necessitating the most robust packaging, while Group III represents lower-risk materials.
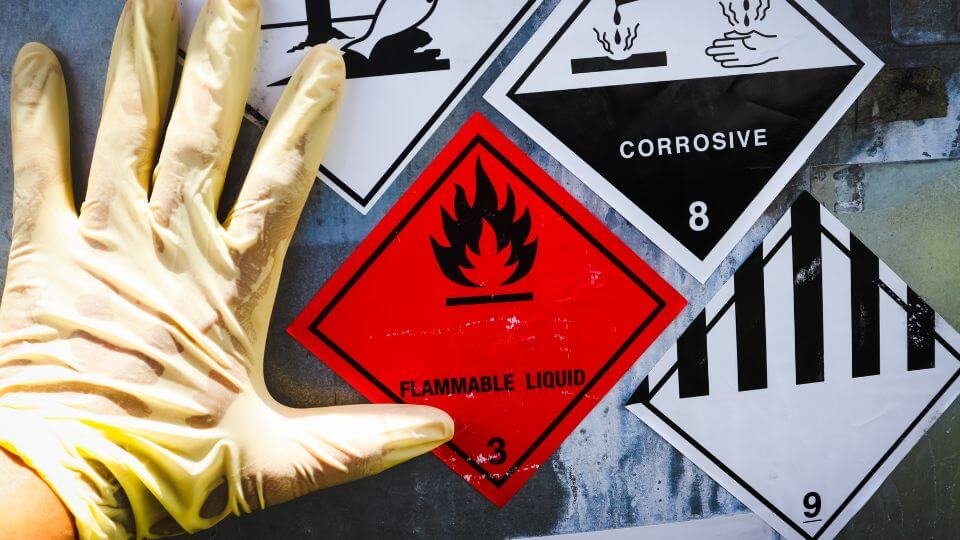
Column 6 (Label Codes): This column specifies the mandatory hazard pictogram(s) required on the packaging based on the material’s hazard class. These pictograms act as a visual communication tool, instantly conveying the potential dangers.
Columns 7-10: These additional columns provide in-depth details such as special provisions for handling or shipping, packaging requirements beyond the packing group designation, quantity limitations for transport to ensure safety, and recommended stowage locations on vessels.
How to Read the HMT
Reading the HMT may seem daunting at first, but with some guidance, it becomes more manageable. Here are the steps:
- Identify the Material: Start by locating the material you’re dealing with in the table. Look for its proper shipping name and identification number to ensure you have the correct entry.
- Determine Hazard Class: Note the hazard class assigned to the material. This classification indicates the primary risks associated with the substance, such as flammability, toxicity, or corrosiveness.
- Check Packing Group: If applicable, determine the packing group assigned to the material. Packing groups indicate the level of danger posed by the substance and help determine appropriate packaging requirements.
- Review Special Provisions and Packaging Exceptions: Pay attention to any special provisions or packaging exceptions that apply to the material. These provisions may impose additional requirements or provide exemptions under certain circumstances.
- Consider Quantity Limitations: Finally, take note of any quantity limitations specified for the material. Adhering to these limitations is essential for ensuring safe transportation and compliance with regulations.
3 Real Life HAZMAT Table Examples
1. Shipping Chlorine Bleach
You work in a warehouse that ships various cleaning supplies. A customer has placed a large order for chlorine bleach. how can you leverage the HMT to guarantee safe shipment?
Step 1: Identify the material by looking up “Chlorine bleach” in Column 2 of the HMT.
Step 2: Understand the hazard by locating the corresponding entry for “Chlorine bleach” in Column 3. This will likely indicate it belongs to Hazard Class 8 (Corrosive materials).
Step 3: Understand shipping regulations by checking Column 1 for any shipping restrictions based on the mode of transport (air, water, or ground).
Step 4: Check packaging and labeling by referring to Column 5 (Packing Group) to determine the appropriate packaging level for the bleach quantity. Column 6 will specify the required hazard label(s) for the packaging (likely a corrosion pictogram).
**Please remember this example provides a simplified example. Always refer to the specific information in the HMT for the exact material you’re handling.
2. Shipping Chemistry Lab Supplies
You work at a university lab supply store and receive an order for several chemicals needed for a high school chemistry class. The order includes:
- 10 litres of concentrated hydrochloric acid
- 5 kg of sodium hydroxide pellets
- 250ml of flammable methanol
How can you use the HMT to ensure safe shipment of these materials?
Step 1: Identify the materials by looking up each material’s proper shipping name in Column 2 of the HMT. This will likely be “Hydrochloric acid, solution,” “Sodium hydroxide, solid,” and “Methanol.”
Step 2: Understand the Hazards by locating the corresponding entries for each material in Column 3. You’ll likely find:
- Hydrochloric acid: Class 8 (Corrosive material)
- Sodium hydroxide: Class 8 (Corrosive material)
- Methanol: Class 3 (Flammable liquid)
Step 3: Check shipping regulations by checking Column 1 for any shipping restrictions for each material based on the chosen mode of transport (likely ground in this case). There might be symbols indicating specific packaging requirements for corrosive materials or flammables.
Step 4: Refer to Column 5 (Packing Group) to determine the appropriate packaging level for the quantities of each chemical. Column 6 will specify the required hazard label(s) for the packaging. You’ll likely need separate packaging for the corrosive materials (hydrochloric acid and sodium hydroxide) and the flammable methanol, with corresponding hazard labels for each.
Step 5: Depending on the information in Columns 7-10, there might be additional requirements for these materials, such as limitations on the total quantity that can be shipped together or specific ventilation needs during transport.
By consulting the HMT for each chemical in this scenario, you can ensure the safe and compliant shipment of these potentially hazardous materials to the high school chemistry class.
3. Shipping Propane Tanks
You run a hardware store and a customer has purchased a large propane tank for their grill. They want it delivered, so you need to ensure safe transport.
How can you leverage the HMT to guarantee safe delivery?
Step 1: Identify the material by looking up “Propane” in Column 2 of the HMT. You’ll likely find it listed as “Liquefied petroleum gas.”
Step 2: Understand the hazard by locating the corresponding entry for “Liquefied petroleum gas” in Column 3. This will indicate it belongs to Hazard Class 2 (Compressed Gases).
Step 3: Check Column 1 for any shipping restrictions based on the mode of transport (likely by delivery truck in this case). There might be symbols indicating specific requirements for securing the tank during transport.
Step 4: While Column 5 (Packing Group) might not be applicable for all compressed gases, Column 6 will specify the required hazard label(s) for the packaging. You’ll likely need a label for flammable gas.
Step 5: Columns 7-10 might provide additional information like specific requirements for the type of propane tank acceptable for transport (e.g., refillable vs. disposable) or limitations on the quantity that can be delivered in a single trip.
By using the HMT for propane, you can ensure the safe and compliant delivery of this flammable gas to your customer, allowing them to enjoy their next barbecue with peace of mind.
Conclusion
The HAZMAT Table is an invaluable tool for anyone involved in the handling and transportation of hazardous materials. By understanding its structure and utilizing the tips provided in this guide, you can navigate the table with confidence and ensure the safe handling of these materials. Remember, safety should always be the top priority when dealing with HAZMAT.
Here are some additional resources to bolster your knowledge:
- The U.S. Department of Transportation’s Pipeline and Hazardous Materials Safety Administration (PHMSA) offers a Hazmat Training Resource Center: Link
- The Occupational Safety and Health Administration (OSHA) provides guidance on the Hazard Communication Standard (HazCom) which includes requirements for labeling and safe handling of hazardous materials: Link
By combining knowledge gained from the HMT with proper training and adherence to regulations, you can contribute to a safer working environment and minimize the risks associated with hazardous materials.
Hazaroud Materials Table FAQs
Q. What is the HMT and what does it do?
A. The HMT, or Hazardous Materials Table, is a comprehensive reference guide that provides information on various hazardous materials. It helps identify these materials, classify their hazards, and outlines regulations for their safe shipping and handling.
Q. What kind of information does the HMT contain?
A. The HMT is typically divided into ten columns, each containing crucial details like Proper shipping names, Hazard class (e.g., flammable liquids, explosives), Identification numbers (UN numbers), Packing group (indicates danger level), Required hazard labels, Special shipping information (symbols in Column 1).
Q. What are the symbols in Column 1 used for?
A. These symbols indicate any special requirements or restrictions for shipping a particular hazardous material. They might signify limitations on transport mode (air, water, ground) or specific packaging needs.
Q. What is the difference between Packing Group and Hazard Class?
A. Hazard Class categorizes the primary danger of the material (e.g., flammable, corrosive). Packing Group indicates the level of danger a material poses within its hazard class (Packing Group I being the most dangerous).
Q. Where can I find the HMT?
A. The HMT is available online from various resources, including government websites like the U.S. Department of Transportation.
Q. Is the HMT a substitute for HAZMAT training?
A. No. While the HMT is a valuable tool, it’s not a replacement for comprehensive HAZMAT training. Proper training equips individuals with the knowledge and skills to handle and transport hazardous materials safely.
Q. What are some additional things to keep in mind when using the HMT?
A. The HMT information applies to specific materials listed. Always double-check the material’s proper shipping name for accuracy. Regulations can change, so ensure you’re using the most up-to-date version of the HMT. When in doubt, consult a safety professional or refer to relevant regulations for specific guidance.


